It's a problem children face - growing out of their wheelchair and needing a new one, even though the old one is still fine. Except, children grow. I shrunk. My old chair is 18"/19" wide, because that's what I needed when I bought it 4 to 5 years ago. Now, I'm a good 2" narrower and I rattle around in my old chair. It no longer supports me properly and there are several aspects that I wanted to change.
My new chair
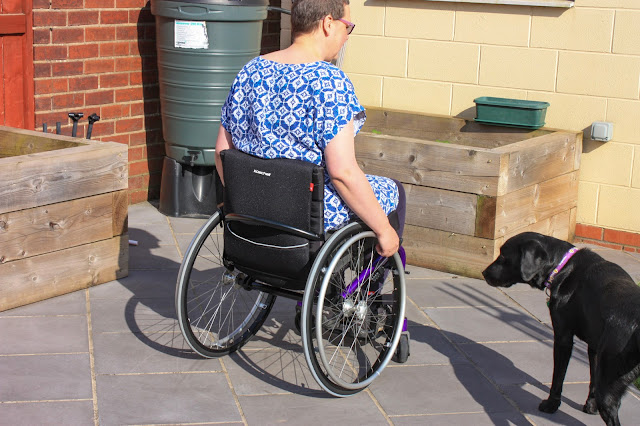
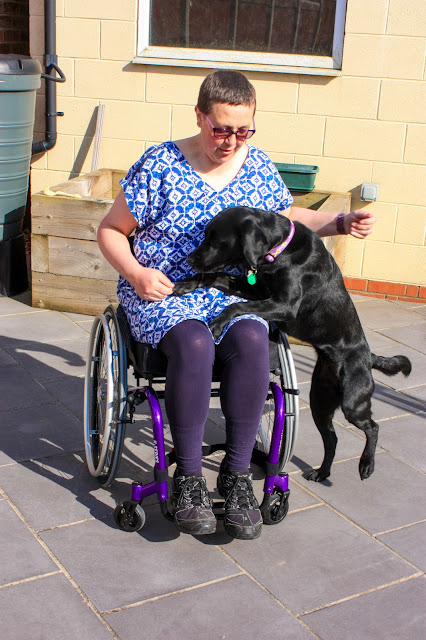
So here is my new chair. It's a Kuschall K-series.
The first thing I wanted to change was the colour. My old chair is white, which is lovely, but a pain to keep clean. White shows all the scratches too. This time, with Canine Partners in mind, I've gone with purple. Now Liggy and my chair match.
Colour isn't that important though really. So some of the other changes are:
- Width - this chair is a standard 16" wide. This will support me better but also will get through narrow doors and other spaces more easily.
- Lower back - with hindsight, the back on my old chair is too high. It gets in the way of my arms and I frequently have bruises from bumping my upper arms on it. This one is much lower, as you'll see in the next photo.
- Front casters - I love the flashing front casters because they attract attention and look really cool. However, they are very hard and are quite uncomfortable on rough surfaces. Also they are thin and that makes thick pile carpers so tiring. So this time, I've gone for wider, softer casters. If I don't like them, I have a plan B but for now, I'm giving them a go.
- Seat cushion - I wish I'd done more research last time about cushions, as they can make a big difference to comfort. The wrong cushion can result in sores and nobody wants those. This time, I've got a gel cushion. It's heavy but really comfy and it sort of cools you.
- Foot plate - this time, I've got the footplate tucked under so that I can tuck my legs out of the way. Also, posture-wise, I'm hoping this will enable me to go faster when I need to. Again, it will help with tight spaces too. I've got a much smaller turning circle now.

Wheels
The only thing I really don't like about this chair, is the wheels but that is just a temporary problem. On Wednesday, my new wheels should arrive. I've ordered a pair of Loopwheels Urban. They are one of their new products and if they are as good as my old Loopwheels, I just know they will be amazing! I'm very excited about getting them and will be posting pictures and videos to show you what they are like.
Meanwhile, I'll just have to make do with these wheels. They are just normal wheels, with an inner tube and a standard tyre. The pushrims are narrow metal ones, which I find difficult to use but with gloves, I'll manage for a few days.
Attaching Liggy
I'll post more about this next time but my old chair has an attachment on it, that Canine Partners put there. It's firmly attached and has a squiggly metal pole, like a pigtail, that I attach Liggy's lead to. I had hoped to find a less permanent option and I've got a couple of carabiners that attach with a velcro strap but I tried them yesterday and they move around too much. We may have to move the permanent attachment over, but if we do, I want something under it to protect my paintwork. It's made a right mess of my old chair!


